Search This Blog

Showing posts with label dessert. Show all posts

Sunday, January 29, 2012

Brownie Pudding

While watching The Barefoot Contessa, I saw a mouthwatering dish she had made for her husband. Now I do love my chocolate... in ANY form, and I figured it would be something I could probably make. I saw "probably"  because as I have stated before, getting certain ingredients in this area is down right impossible! Like the Vanilla Bean she calls for. The employees at the store just give you a bewildered look when you tell then "No, I do not want extract, I want the whole bean!". I used to love going food shopping. *Sigh*

But not to fear, I came up with my own version of this great dish that tastes heavenly! So grab a spoon and dig into this! It serves any where from 4 (if you really really like chocolate like I do) to 8 (for those trying not to be a pig like my dear hunny). Its easier than it looks so give it a try!


2 Sticks Butter, melted and cooled
4 Eggs
2 cup Sugar
3/4 cup Cocoa Powder
1/2 cup All Purpose Flour
1 tsp Cinnamon
2 tsp Vanilla
1 tbsp Red Stag (Cherry Bourbon) or  Framboise (Raspberry Liquer)
Chocolate Chips (Optional)
Walnuts (Optional)

1) In saucepan, melt the butter and set pan aside to cool. Preheat oven to 325. Prepare 9 inch oval baking dish by greasing it, set aside.

2) In food processor cream together eggs and sugar. In medium bowl, sift together flour, cocoa and cinnamon. Back in processor, add vanilla and bourbon, pulse to blend. Slowly begin to add the dry ingredients and finally the butter.

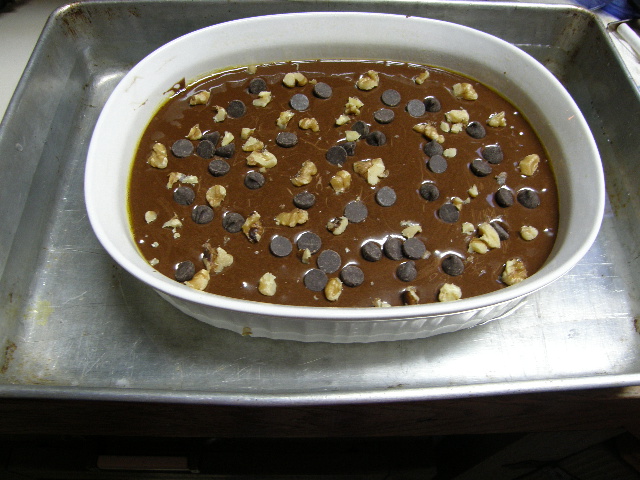
3) Pour batter into prepared dish. Sprinkle the top with chocolate chips and nuts if desired. Set dish into a larger casserole dish and fill the larger one up with water to about the same height as your batter.

This will give it a good even baking on the edges. Bake for 1 hour to 1:15. It's done when you can insert a toothpick into the center and pull it out still wet with the edges pulling away from the sides.


Saturday, December 31, 2011

Chocolate Covered Cherry Cake & Muffins

This is something I came up with years ago out of necessity. I was working on a cake to bring to work and realized I didn't have any oil. It was right around eleven at night and I was not about to head to the store... after all, everything else was ready to go. So I went on a hunt and found a can of cherry pie filling. The cogs in my head slowly started to turn and the little light finally came on. Why not use the filling as the oil? It came out marvelous!

I can't tell you how many people have begged for the recipe over the years, but I always held onto it like my life depended on it. Not even to family would I hand it over. So feel lucky my loyal readers, I am finally going to hand it over to you... if I can ever hit the "Post" button that is! ;-)

(So good it doesn't need frosting! But you can frost away if you want!)


1 box Chocolate Cake Mix
2-3 Eggs (depending on the amount the box calls for)
Water (depending on how much we improvise)
2 can Cherry Pie Filling, drained (reserve liquid)
Chocolate Chips
Frosting, optional

For Cake:

1) Grease and flour your cake pans. Spread drained cherries in a single layer in each pan. Set oven to 350 (or which ever temp your cake mix calls for).

2) In large bowl mix eggs. Look at the amount of oil on the box and use the appropriate amount of reserved cherry liquid instead and pour it into the bowl. Same thing with the water. If you do not have enough liquid to make the water, add water from the tap to fill it up. Mix your ingredients with a hand mixer for about 2 minutes unitl the batter is nice and smooth. Pour over top of the cherries in the prepared pans. Sprinkle the top with chocolate chips to cover it. Bake according to package length or until the center is set and a toothpick comes out without cake on it (although you might have cherry or chocolate on it).

3) Let cool a couple of hours on a wire rack before removing from pans. This is sweet enough for most tastes but go ahead and ice it if you want.


For Muffins:

Same ingredients as above.

1) Line your miffin tin with muffin paper cups. Set oven to cake mix temp.

2) Mix ingredients as stated above. Using spoon add batter to muffin cups to fill halfway. Place 2-3 cherries in each muffin and press down slightly. Fill muffins with remaining batter. Spinkle 6-8 chocolate chips on top and lightly press into batter. Bake for reccomended time on package.

Wednesday, December 21, 2011

Black Berry Bread Roll

Some of you may remember going to your Grandma's house (if you do not know what it is, don't tell me! I'm old enough as it is) around the holidays and having her "famous" Prune Roll... a taste you never grew to like. I am one who never grew accustomed to prunes... but I did like the concept of fruit being rolled in a sweet bread and baked to a golden brown and drizzled in a sugar glaze... I'm already drooling.

Below is something I came up with to settle that particular craving. I'm somewhat surprised I was able to get it to rise since I live so high up and have been fighting the humidity this past week. But it popped out of the oven just right... and in time for an impromptu visit from my mom and step dad. I swear they have a sixth sense about things baking.

This recipe makes 2 loaves so you can either make two different kinds or for those of us looking to save our waist line, give one to a friend.

So good we couldn't wait for it to get onto a serving platter!


DOUGH
1 pk Instant Active Yeast
1 cup Milk, warm
1/2 cup Butter
1/2 cup Shortning
3 Eggs, seperated from the whites
3 tbsp Sugar
1 tsp Salt
3-4 cups Flour
FILLING
24oz Black Berry Preserves (any preserve will due)
1/4 cup butter
Cinnamon
GLAZE
1 cup Powder Sugar
1/4 ts Vanilla
2-3 tbsp Water

1) In large bowl mix together yeast and milk until yeast dissolves. Add butter, shortning, 3 egg yolks (save the whites), sugar, salt and 3 cups flour. You want to add the flour slowly so you do not have a kitchen white out (trust me on this). Add enough of the flour to form a soft dough. Cover the dough (in the bowl) with plastic wrap and let sit about 12 hours in the refrigerator.

The Next Day

2) While in the bowl, divide the dough in half and recover reaminder in bowl. Take the other half and place on a lightly floured surface. Roll out until its about 12x5". Sprinkle with cinnamon and then dot with half the butter.

Using large spoon, drop spoonfulls of the preserves onto the dough and smear it in to make an even layer.


3) GENTLY take the bottom length of dough and pull it up and over to half way.

Take the top and pull it down to make the trifold roll and tuck in the ends. Place on a lightly greased cookie sheet, seam side down, cover and let rise 2 hours in a warm, dry place. Now repeat this with second half of dough.


4) Preheat oven to 350. Using leftover egg whites, make an egg wash using 2 tsp of water and beat well. Uncover dough and brush egg wash over breadand place in oven. Bake for about 25 minutes. Let rest about 10 minutes on wire rack before glazing.

5) Mix the glaze ingredients together using a fork. You might need to use more powdered sugar to get the proper consistancy for the glaze. Fill the fork with the glaze and drizzle it over the top of the bread.

Saturday, December 17, 2011

Citrus Cranberry Biscotti

I can definitely see why this recipe was a winner in Better Recipes contest. But of course, I had to change just a couple of things to work with allergies as well as what we are able to buy here in the middle of no where. It was remarkably easy and the flavors jump all over your tongue. Try it with your breakfast coffee or a late snack with some hot cocoa.


3/4 cup Sugar
2 tsp Lemon Zest
2 tsp Orange Zest
2 Eggs
2 tbs Butter, melted (at room temp)
1/2 tsp Lemon Juice
2 cup All Purpose Flour
1 tsp Bking powder
1/2 tsp Cinnamon
1/4 tsp Baking Soda
Dash Salt
2/3 cup Cranberries, dried and chopped


1) Preheat oven to 350. Line a baking sheet with parchment paper.

2) In large bowl, mix sugar, lemon and orange zests together. Reserve 1 tbsp and set it aside for later.

3) In same bowl, add egg, butter and juice and beat until thick and pale, about 5 minutes (up here it took 8).

4) In med bowl, *sift together flour, baking powder, baking soda, cinnamon and salt. Add half the mixture to the egg and beat until smooth. Add remaining flour and stir until smooth. Last, add in the cranberries and stir to combine. *If you do not have a mixer, use a deep strainer.

5) Turn dough onto a lightly floured surface and mold into a 9" log. Place on baking sheet. Flatten the top just slightly and sprinkle the reserved tbsp of sugar and press it in lightly.

6) Place in oven and bake 22-28 minutes (about 32 up here in the clouds) until golden and crusty. Check with a toothpick in the center to make sure its not doughy in the center before moving to the next step.

7) Let cool about 10 minutes (important if you do not want to burn yourself). Reduce oven to 300. Cut log into diagnal slices about 3/4" thick. Place slices, cut side down on baking sheet.

Bake 10 minutes, remove and flip slices over. Return to oven another 10-12 minutes until top surface is crisp but not browned.

Friday, December 16, 2011

Egg Nog Cookies

I found this delightful recipe over at the Hungry Girl blog. Super yummy! These came out moist and kind of cakey with a not too sweet icing. I had to add a few things for my own taste buds as well as to make up for the altitude (I live about a mile high). They still came out wonderful. I am making a trip into town today to bring some to my mom. After all, its the least I could do for that EVIL recipe she sent me... 5 Minute Orange Kissed Chocolate Cake. I mean, how cruel can one's own mother be? ;-)

I made around 20 cookies with this, but I also used a bigger spoon.


1 1/2 cups Flour (add 2 tbs if living in higher altitudes)
1/4 tsp Nutmeg
1/4 tsp All Spice
1/4 tsp Cinnamon
1/4 tsp Baking Powder
1/4 tsp Salt
6 tbs Butter, soft (leave out for a couple hours before you begin)
3/4 cup Sugar
1 Egg
1/2 tsp Vanilla
1/3 cup Egg Nog

1) Preheat oven to 350. Line 2 cookie sheets with parchment paper.

2) In medium bowl, mix flour, nutmeg, all spice, cinnamon, baking powder and salt; set aside.

3) In large bowl beat together (hand mixer or if your lucky use your Kitchen Aid mixer) the butter and sugar until light and fluffy. Add egg and vanilla and beat until smooth.

Alternately add in the flour and egg nog, starting and ending with the flour (add too much flour at once will cause a white out in your kitchen... take it form someone with lots of experience with this!).

4) Using a spoon, drop spoonfuls onto the cookie sheets about 1 1/2" apart. Bake one sheet at a time until cookies become puffy and edges are a light brown, about 9-12 minutes. Let cool for 5 minutes before moving cookies to wire rack and icing them (Glaze Recipe follows).

For the Glaze:
1 cup Powdered Sugar (plus more if needed)
Dash of Salt
1/8 tsp Nutmeg, freshly grated or ground
2 tbsp Egg Nog
1 tbsp Butter, melted

1) In small bowl, mix all together with a spoon until smooth. Add more or less powdered sugar until you get a good consistancy. Using back of spoon, smooth and drizzle tops of cookies 5 minutes after coming out of oven.

Thursday, December 15, 2011

Oatmeal Cranberry Chocolate Bars (No Baking!)

So, the other day I was hungering for something sweet. My first thought was to try making Divinity... after all, I had just bought everything to make it. Or so I thought. Apparently my hunny had a hankering for eggs one night and used them all up. At least he didn't find the cherries!

Well, off I went in search of a recipe that was quick, easy and most importantly, something I had all the ingredients for here at the house since town is 17 miles away. I finally settled on Oatmeal Bars. Although, I was unable to come up with all the "proper" ingredients, I WAS able to get this one together. It wasn't quick, but the results were great! I had to hide them in the fridge until they were ready to take pictures of since my hunny kept trying to get into them before they were ready.

This recipe was made for a small amount but can easily be doubled.


1 1/4 cup Oatmeal (quick oats)
1/3 cup Brown Sugar, packed
1/3 cup Butter
1/2 tsp Cinnamon
1/4 cup Light Corn Syrup
1 cup Cranberries, dried (Craisins)
1/2 cup Chocolate Chips
1/4 cup Peanut Butter

1) In large bowl mix oats, sugar, butter, cinnamon and syrup. Place in microwave and heat 2-4 minutes until mixture becomes bubbly.

3) Spread mixture evenly in bottom of foil lined loaf pan. Top with cranberries and pat down. Chill in refrigerator 2 hours.

4) In bowl mix together chips and peanut butter. Heat in microwave 1-1/2 minutes, just until chocolate becomes soft. Remove and immediately begin to stir. Continue until all is smooth and blended well. Spread over top of oat bars and place in refigerator another 2 hours for chocolate to set.

5) Slice into bars and keep in air tight container in the refrigerator.


Monday, November 21, 2011

Triple Chocolate Cookies

Oh yeah... doing the happy white girl dance (its not a pretty thing)... I baked edible cookies! More than edible... these are the bomb! I might turn out to be a baker after all!

It all started on a search for some good ole chocolate chocolate chip cookies. It's one of those recipes that you just can't find anywhere... so I made my own. And it worked! Can you tell how excited I am yet? This recipe will make between 12 and 24 cookies... depending on how big your spoon is.


2 1/4 cup All Purpose Flour
3 tbsp Cocoa Powder
1 tsp Baking Soda
1/2 Tsp Salt
1 cup (2 sticks) Butter, softened
3/4 cup Sugar
3/4 cup Light Brown Sugar, packed
2 tsp Vanilla
2 Eggs
1 cup Semi-Sweet Chocolate Chips
1 cup White Chocolate Chips
1 cup Walnuts, chopped *(optional)

1) Heat oven to 350 (325 for a toaster oven).

2) Whisk together flour, cocoa, soda, and salt until incorporated.

3) In large bowl beat butter and sugars until creamy. Add vanilla and eggs and beat until smooth. Slowly add in the flour mixture until all is blended. Stir in chips and nuts.

4) Drop mixture by the spoonful onto a lightly greased cookie sheet, sides not touching. Bake for 8-10 minutes. Let cool 5-10 minutes before removing from pan.

*Since I am allergic to nuts, I put them all on individually.